Crew Hours
| Audience: | All users |
| Last Reviewed: | 27 January 2026 |
| Introduction: | This topic explains how to use the Work & Rest application |

The Work and Rest application is made up of two modules - Head of Department and Crew Hours
This functionality is for ALL Crew Members

Crew Hours allows for ALL crew members to enter and commit their hours of work and overtime
After the hours have been entered and committed by the seafarer, it is then the task of the HOD to review and approve the hours of Work & Rest
Click on the [ShipSure] icon, then [Work & Rest] then select [Crew]
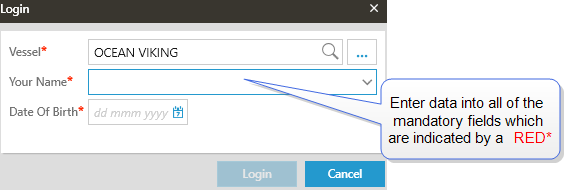
The crew member will now require to Login
When complete click on the  button and this will open the current month (by default) hours of Work and Rest grid for the seafarer
Date filter - use the date filter to change to view to a different month
View Regime - to view the Current Regime description and Logs
Undo & Redo - use the undo and redo to reverse or recreate an action on the page
Work & Rest Reports - use the print option to print Individual Monthly hours or a Monthly Blank template
On the Crew Hours of Work and Rest page there is a key which shows the meaning of the entries being made

The page will show the current month but this can be changed as required
A separate Daily Hours grid an be loaded where the daily hours are broken down into hours instead of days
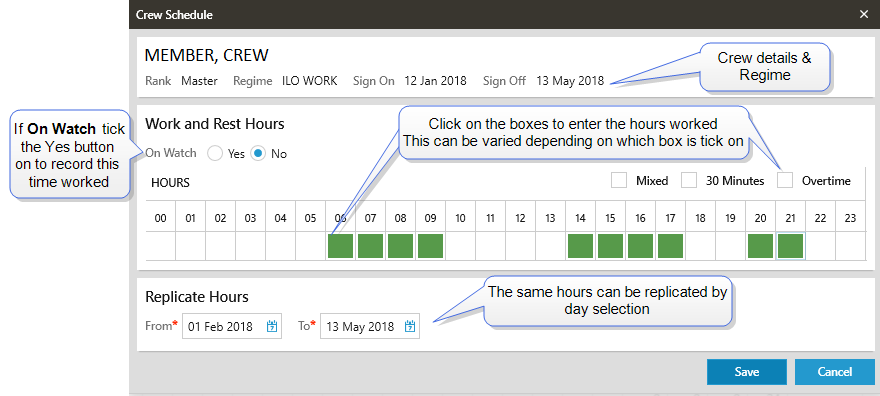
Adding hours into the Daily and Hourly grids is carried out in the same way
Before making any entries select the appropriate box then click into the grid
- Click into each box of the day or hour that has been worked and the box will turn Green
- Select the Overtime check box, to mark the hour as an overtime entry
- Select the 30 minutes check box, to add 30 minute interval entries
- Select the mixed hour’s check box, to add mixed hours. To enable entering hours where only one half is overtime and the other is not.
- To cycle through the selection of available inputs i.e. enter the first or second half of the hour when using 30 minutes input, click repeatedly on the same cell and a triangle will appear in the top half indicating AM or the bottom half indicating PM
- If the same hours are worked on a regular basis use the Replicate Hours date functions to replicate the initial entries over a given period of days or hours or until Sign Off
- When all of the entries have been made click on the
 button to complete the process
 - A green bar will populate at the bottom of the screen confirming that the

- If Unsuccessful the incorrect data will be highlighted in Red with an error message to assist in correcting the error
The Daily grid will now be update with all of the hours entered and several new tasks can now be performed from here
View Hourly Schedule
The hourly schedule can be viewed and updated by clicking on the  icon
icon
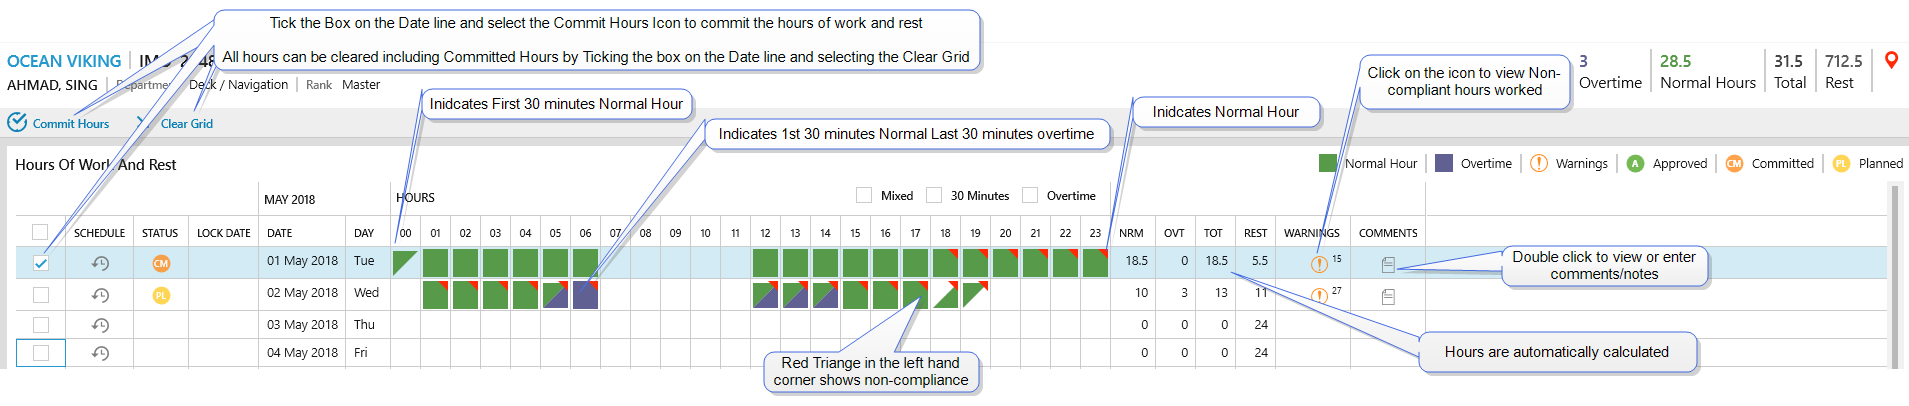
Commit & Clear Grid
By ticking the box to the left of the Date Line and selecting the  icon the hours of Work and Rest that have been input will change status from PL (Planned) to CM (Committed)

The system will request confirmation, select Yes and the system will confirm that the 
By ticking the box to the left of the Date Line and selecting the ![]() icon the hours of Work and Rest that have been input on that date will be removed
icon the hours of Work and Rest that have been input on that date will be removed
![]()
The system will request confirmation, select Yes and the system will confirm that the ![]()
NOTE: If the Clear Grid has been actioned in error, the Undo/Redo cannot undo a Clear Grid action, the hours would need to be input again
Status
The Status column will display an icon that informs the user of the status of the Hours of Work and Rest that have been entered
- PL = Planned
- CM = Committed
- A = Approved
Warnings
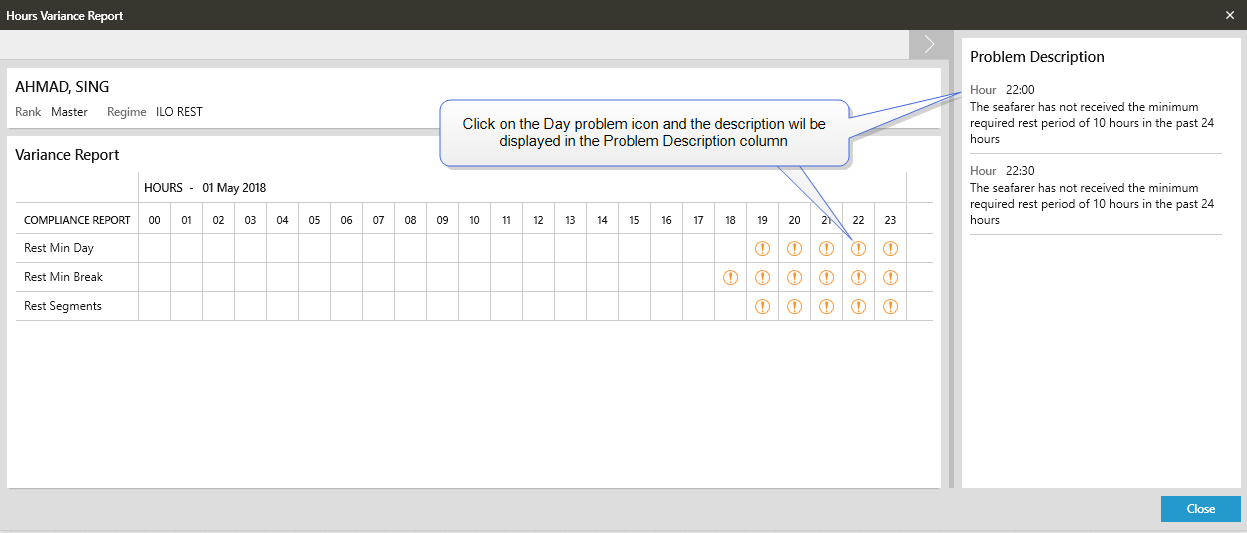
Click on the  icon to view the reasons and descriptions in the Hours Variance Report
Comments
Click on the  icon to view any comments that have been entered
